If you’ve been out fishing, cruising, or towing the kids around and your boat has been in salt water, there’s one simple job you shouldn’t skip when you get home – flushing your outboard motor.
It might seem like a small thing, but regular outboard maintenance can save you from expensive repairs and help keep your motor running smoothly for years. Salt left sitting inside your cooling system can cause corrosion, block water passages, and shorten the life of your engine.
The good news? Flushing an outboard motor is quick, easy, and doesn’t require much gear.
Why should you flush your outboard motor?
If you boat around New Zealand, chances are your engine spends plenty of time in salt water. This is tough on engines, and salt build-up inside the cooling system can create problems over time.
Flushing your outboard helps:
- Remove salt and sand from the cooling system
- Reduce corrosion and build-up
- Help prevent overheating issues
- Extend the life of your outboard
- Keep your engine running at its best
As a general rule, you should flush your motor after every trip. Even if it was only a quick fish after work, it’s worth doing.
What you’ll need
Before you start, grab:
- Garden hose
- Outboard earmuffs (choose good quality ones, round is better than square for better sealing)
- Access to fresh water
Some newer outboards have a built-in flushing port, which makes the job even easier.
How to flush an outboard motor – step by step guide:
Step 1: Park your boat somewhere level
Make sure the boat and trailer are sitting on level ground and your engine is in an upright position. Don’t leave the motor tilted up, as water needs to drain properly.
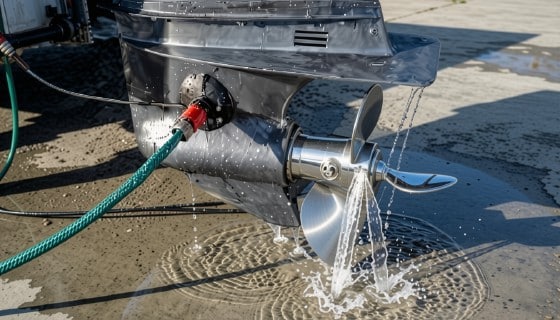
Step 2: Connect the water supply
Depending on your outboard, you’ll either:
Use outboard earmuffs: Place the muffs over the water intake ports on each side of the lower unit and connect your garden hose.
Use a flushing port: Connect the garden hose directly to the built-in flush fitting.
Check your owner’s manual if you’re not sure which system your motor uses.
Step 3: Turn the water on
Turn the hose on fully before starting anything else.
For motors with flush ports, many manufacturers recommend leaving the engine switched off while flushing. If you’re using muffs, some motors need to idle while flushing but always check your owner’s manual first.
Step 4: Let it flush properly
Allow fresh water to run through the system for around 10 minutes.
You want enough time for fresh water to push out salt, sand and debris that may be sitting inside the cooling passages.
Step 5: Turn everything off and drain
Switch the engine off first (if it was running), then turn the hose off.
Leave the motor upright for a few minutes so excess water can drain out properly.
Common mistakes to avoid
A few things we regularly see:
- Forgetting to flush after saltwater use
- Running the motor without water
- Not checking that flush muffs are sealed properly
- Tilting the motor up straight away
- Assuming rainwater rinses everything out
How long do you flush an outboard motor for?
For optimum maintenance we recommend 10 minutes at a minimum, up to a maximum of 15 minutes to ensure you’ve flushed out all the salt residue.
Keep on top of your outboard maintenance
Flushing your motor is one of the easiest boat maintenance tips you can do at home, but it’s only one piece of the puzzle. Regular outboard servicing, gear oil checks, battery maintenance and inspections all help keep your boat reliable when summer rolls around.
If you’re unsure whether your motor is due for a service just talk to the team. We can help with outboard servicing, parts and accessories, and keeping your boat ready for the next trip out on the water.